
Epoxy garage floors are one of the most durable garage floor options. They are well sought after because of the combination of beauty and durability that they offer. Garages serve more than just as a space to park your vehicle as such, they do not have to be boring.
Whether you have a single-car garage or a two-car garage, you need flooring that can hold your vehicle without breaking or getting damaged. Epoxy creates a tougher layer than applying pain on your concrete floor.
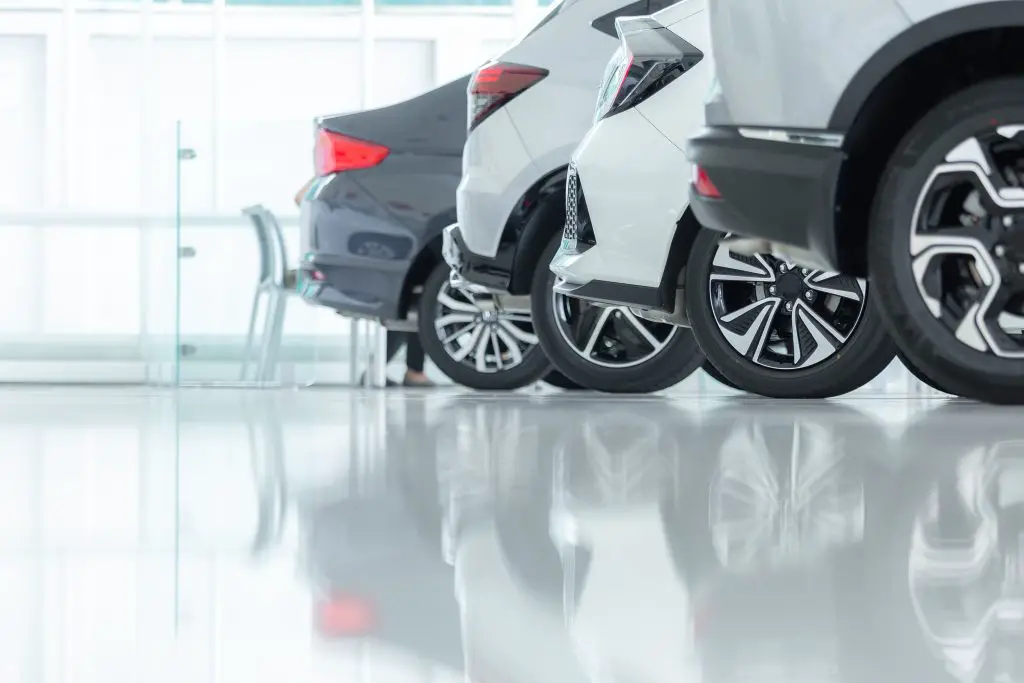
Why Epoxy Garage Floor
An epoxy is a durable option for garages offering high resistance to abrasion, chipping, impacts, abrasion, and traffic. Also, they are perfect for covering any imperfections such as spider cracks on the concrete.
Asides from that, they can be styled in different ways to give your garage a beautiful appearance. Your options for design with an epoxy garage floor are virtually endless.
You should not be concerned that oil stains will detract from the appeal of your epoxy garage floor. These are easy to clean making them resistant to stains from transmission fluid, engine oils, and water beads.
Epoxy flooring is designed to prevent tire slippage. A combination of elegant design and durability makes epoxy an option to be considered for your garage floor even in a commercial garage.
Because they are very durable, you get value for your money when you install an epoxy garage floor. In residential homes, epoxy garage floors can increase the home’s value.
What is an Epoxy Garage Floor?
Epoxy garage flooring is a finishing done to your garage floor by applying several layers of epoxy. Epoxy itself is a thermosetting resin applied on the surface of the concrete. It is formed by mixing the epoxide resin with a polyamine hardener.
This is very different from acrylic paints used to cover surfaces. Epoxy garage floor coatings offer more durability than paint. As the polymer structure is cured, what you have left behind is a more resistant surface.
Materials needed to Epoxy your Garage Floor
- Concrete degreaser
- Epoxy garage floor kit
- Acid-Etching solution
- Painter’s tape
- 3-inch paint brush
- 9-inch paint roller
- Broom
- Vacuum
- Garden hose
- Rubber gloves
- Mixing paddle
- Bucket
- Roller extension handle
How to Epoxy Garage DYO Floor-Step by Step
A garage floor made of epoxy can easily be installed.
Clean the garage
Preparing the floor is important for proper epoxy installation. You would need to clean the garage to ensure there are no blockages while working. Remove items, clutter and debris to ensure a free working space. If you would be working around objects such as water pipes, try covering them with a painter’s tape.
After clearing the space, sweep the floor to remove dust and dirt. You could use a brush to thoroughly work the corners of the room. Grease and oil can be removed using soapy water and brush.
You could also mop the floor to ensure it is free of dirt that might affect the bonding of the epoxy. Try running water from a garden hose to rinse the room off soap and dust.
Prepare the floor
For a perfect look, it is best to ensure your concrete is perfect. If your floor is already painted, you would need to scrape off the paint especially if it is glossy. Once this is removed, you can proceed to clean the floor and mopping it.
Asides from removing paints, cracks or chips in the concrete floors should be fixed to create a flawless epoxy garage floor. Where this might be difficult, it is always best to start on a fresh concrete slab.
Etch the concrete
With your bare concrete floor already cleaned, etching it comes next. Etching removes chemicals used to degrease the floor. It opens the pores and allows easy bonding with the epoxy.
Usually, these are acid solutions that come with the epoxy. Start by combining the etching solution and water according to the instructions on it. Scrub the floor after applying the etching solution using a brush or broom. Work on the entire floor.
You would notice the solution foam as it works on the surface of the floor. Continue till the foaming or fizzing stops.
Etching could also be done mechanically using a diamond grinder, grit blasting using sand or quartz. Once the whole floor is well etched, it should feel like sandpaper. You could then vacuum the dust or rinse off the acid using water from a garden hose.
Mix the epoxy
The epoxy resins for the garage floor usually come in two tins; an epoxy base and a hardener. With the floor set, the next thing is to mix the two tins. Start by stirring the epoxy paint and pouring in the hardener. You might need to keep stirring for about 3 minutes till you achieve a uniform consistency.
In some cases, you might need a bigger bucket to mix the components as the tins might be small. Ensure that the bucket is cleaned so it does not get contaminated. Any other thing you want to add such as an anti-slip can be added here and thoroughly mixed. Most epoxy paints come with instructions that you can use as a guide when mixing.
Apply the epoxy coating to your garage floor
The epoxy coating can be applied to your garage floor once it has been properly mixed. It must be used up within two hours, so move quickly. Higher temperatures might result in less of this. A brush or a roller could be used to apply it.
It is usually easier to use a brush to paint the corners or the borders. For a larger garage or to move faster, you could get someone to help you mark out the edges with a brush.
It is easier to work with a 3 inches brush on the outlines and work the insides with a roller. You might want to consider working in sections to keep things easier. Continue till all the floor has been covered.
Add decorative chips
Once your floor is painted, and you are satisfied with a single layer, you can add the decorative chips if you so desire. To get this done neatly and easily, try applying them as soon as you complete a section. Applying these decorative chips is done by simply pouring them on the epoxy floor.
Let the floor dry
Once you are done covering the floor, allow the epoxy coating to dry. This could take about 24 hours or could vary depending on the weather. Ensure proper aeration to increase the drying rate.
Whether you want to add another layer of epoxy or you want to park your car right on it, allow it to dry. A completely dried garage floor for driving cars can take several days.
Add subsequent layers
For a garage floor, it is often advised that you apply more than one layer of epoxy. Wait at least 12 hours after the first coat has been applied before applying a second coat. Although drying may take longer, this provides the epoxy floor ample time to be touch dry.
The clear top coat is the last layer to be applied. The floor now has a polished aspect. Along with the appealing advantages, it offers your floor one more layer of defense.
How Much Does it Cost to Epoxy a Garage Floor
While it might cost more, adding an epoxy garage floor is a nice addition to your home. There is no fixed cost for an epoxy floor. Pricing per square foot could be as low as 0.27 cents and overall cost for the garage could range from between $1,100 and $3,500. The exact amount you would spend however depends on several conditions such as;
- The size of the garage measured in square foots
- The preparation done on the concrete or base surface
- The product to be used
- The chosen epoxy garage floor paint
- The amount of coats
- Addition of special designs
- Whether you do it yourself or hire a contractor.
Epoxy Garage Floor Contractors
While you can install your epoxy garage floor by yourself, hiring an epoxy garage floor contractor takes a lot of stress off you. You can find contractors close to you. In searching for an epoxy garage floor contractor, seek out those who are licensed and insured.
You might also want to check out contractors based on referrals from those who have used their services. Prices of epoxy garage floor contractors vary based on several factors. You should also get a quote before deciding which contractor to go with.
How to Clean an Epoxy Garage Floor
Epoxy garage floors should be cleaned properly to ensure longevity of the floor. To clean your epoxy garage floor, start by sweeping or vacuuming dirt or debris on the floor.
With the debris out of the way, using warm water and soap, mop the floor. You can use hot water to rinse out the floor if there are residues or oil on the floor. After mopping, dry out the floor using a squeegee.
Avoid anything that could damage the epoxy by puncturing, chipping or scratching the epoxy. When mopping, avoid using an acid cleaner as it could damage the epoxy.
FAQs
Is Epoxy good for the garage?
Epoxy is a good flooring choice for garages. It brings a modern appearance while offering protection to the concrete floor from stains such as oil and grease. For garages, different weight can cause cracks on the concrete but an epoxy floor can help cover or prevent those.
How long does epoxy last on the garage floor?
A common expectation is that your epoxy garage floor remains appealing for about three or five years. While epoxy is a durable material for garage floors, how long it would last depends on several factors. The weight of your vehicle, the quality of the finish and the traffic in the garage affect how long epoxy lasts on garage floor
Can you epoxy over epoxy garage floor?
Yes, you can put another layer of epoxy over a cured epoxy garage floor. Another coat of epoxy may be applied as long as there are no faults in the garage floor. To accomplish this, you must make sure the initial coat is fully cured.
Once that is confirmed, you would need to sand the old epoxy layer to ensure proper bonding with the next. Any defects on the old epoxy layer such as a bloom should be removed before sanding.
Do I need to prime my garage floor before epoxy?
Yes. Priming serves as the foundation for your top coat. Most primers come in two parts needing to be mixed before they can be used on the floor. Ensure that the mixture is properly mixed before applying on the floor.
Epoxy garage floor DIY vs professional
You can epoxy your garage floor by yourself or get a professional contractor to do it. Getting an expert might cost more than buying a regular DIY kit but has its perks. DIY kits are mainly painted with a higher water content than those used by professionals. With more solid epoxy, professionals are bound to offer a lasting epoxy garage floor and create varied appearances and designs.
How many coats of epoxy do you put on a garage floor
Your garage floor should receive at least two layers of epoxy. Aside from the epoxy primer, the following two coats give your floor durability properties and color for a beautiful appearance.
After installing the primer, wait for about 24 hours before installing the next layer. If you are seeking to add several layers, you would repeat the same process waiting not less than 12 hours and not more than 48 hours.
Final Words
In addition to completely changing the look of your garage, installing an epoxy floor has several advantages, such as being durable and simple to clean. If done correctly, you can be certain that you will ultimately receive value for your money.
Have you thought of epoxy flooring for your garage floor? Everything you need to know about setting one up for your garage is provided in this post.
